Category: Uncategorized

  • Family Health History Checklist for Product Teams

    A family health history checklist can be a useful product-planning artifact when a healthcare team needs to collect, review, correct, and retain patient-entered information through a defined workflow. This guide is for founders, product leaders, and operations teams designing patient-facing healthcare software. Its outcome is a scoped intake workflow with clear ownership, data states, review controls, and integration boundaries.

    This is product-design guidance, not medical advice. It does not diagnose a condition, interpret an individual’s family health information, or recommend care. Clinical, legal, privacy, security, and accessibility decisions should be approved by the people accountable for them in the markets where the product will operate.

    Start by treating the checklist as more than a screen full of questions. The product needs to account for incomplete entries, uncertainty, updates, staff review, access permissions, and the destination of submitted information. Defining those decisions before implementation makes the scope visible to the people who will build, operate, and approve the workflow.

    Before You Start

    Bring the workflow owners together before creating a questionnaire or selecting an integration. A form can appear complete while leaving its review path, data ownership, or exception handling unresolved. The planning group should document decisions, owners, and open questions in one product brief.

    • Clinical owner: the person or group that approves the intended questions, terminology, review rules, and clinical boundary.
    • Product owner: the person who can decide release scope, priorities, and acceptance criteria.
    • Privacy and security reviewer: the person responsible for identifying applicable obligations and reviewing proposed data handling.
    • Operations owner: the person who understands how staff will receive, clarify, correct, or route submissions.
    • System-of-record owner: the person accountable for the destination system, export process, or integration contract.

    Also state what the first release will not do. For example, a release may collect and route information for authorized review without producing a health interpretation. This boundary helps the team avoid expanding a routine intake feature into an unapproved decision-support feature.

    Step 1: Map the intake decision before designing screens

    Define the operational decision that the family health history workflow is intended to support. Begin with users, actions, states, and ownership rather than a list of fields. Specify who enters information, who may review it, when clarification is needed, and what happens if a reviewer is unavailable.

    Create a journey map that covers the following stages:

    1. Entry: where the person receives an invitation or finds the workflow.
    2. Identity and session: how an in-progress or submitted response is associated with the appropriate account.
    3. Completion: how the person enters information, skips an allowed question, or records uncertainty.
    4. Submission: what changes when the person confirms the entry.
    5. Review: which authorized role sees the submission and under which status.
    6. Resolution: how clarification, correction, and review decisions are recorded.
    7. Destination: where the information is displayed, retained, exported, or reconciled.

    Use one operational scenario to test the map. A person might save a partial questionnaire, return later, submit an uncertain answer, and receive a request for clarification. The brief should state whether drafts remain editable, whether submission creates a new version, and how a reviewer can distinguish an original entry from a later correction.

    This is an internal workflow-design problem as well as an interface-design problem. Teams can apply the same discipline used in custom internal tools development: name the users, permitted actions, states, handoffs, and owner for each exception before committing to implementation.

    Step 2: Define the family health history checklist data model

    Write the minimum information model in plain language before selecting a database schema or an integration format. A data model is the agreed structure for storing information, including the relationships between records. For this workflow, the model should preserve what was reported while making the record’s source and review state visible.

    Decide how the product will represent the following items:

    • the person completing the entry and the account or record to which it belongs;
    • relationship categories approved by the clinical owner;
    • reported conditions or concerns, where an approved terminology set is used;
    • age, age range, or other context only where collection and use have been approved;
    • an explicit uncertainty state, such as unknown or not sure, rather than an ambiguous blank;
    • free text, including its permitted length, visibility, review route, and export treatment;
    • provenance, meaning whether information was entered by the patient, changed by staff, or received from another system;
    • timestamps, submission status, and version history.

    Separate reporting, review, and correction

    Do not collapse every value into one generic record. A patient report is what the person supplied. A reviewed record is a status or action applied by an authorized role. A correction is a later change that needs its own author, time, and reason. Model these states separately so the interface does not present an unreviewed submission as though it has been reviewed.

    Keep terminology governance explicit. The product requirements should identify the approved terminology source, the person who can request a change, and the approver for that change. A development team should not independently expand the question set or condition list simply to make the questionnaire appear more comprehensive.

    Step 3: Design a questionnaire that preserves uncertainty

    Design the patient-facing experience around clear completion and review, not around collecting the greatest possible number of fields. Begin with a concise explanation of the workflow’s stated purpose, the kinds of information it requests, and what happens after submission. Use plain language and avoid wording that suggests a person’s answer has a particular health meaning.

    Use progressive disclosure where it reduces unnecessary questions: show an approved follow-up only when an earlier response makes it relevant. The requirements should still list each possible question, trigger, validation rule, and resulting state. Progressive disclosure changes the path through the experience; it does not remove the need to specify the complete workflow.

    Include these interaction requirements in the first release:

    • save-and-return behavior, with a clear indication of whether the draft has been saved;
    • a visible unknown or prefer-not-to-answer option when the relevant owner has approved it;
    • error messages that identify what needs attention without interpreting the response;
    • a review screen that displays entered information before submission;
    • a clear distinction between editing a draft and changing a submitted record;
    • acceptance criteria for keyboard operation and assistive-technology use.

    Do not force false precision. An unknown answer, an omitted optional answer, and an incomplete draft are different product states. Decide how each is stored and displayed. If uncertainty is permitted by the workflow, preserve it rather than replacing it with an invented value or treating it as a validation failure.

    Step 4: Build a review workflow with named owners

    Turn each submission into an operational work item. Define the review queue, status labels, assignment rules, notification rules, and correction path. A simple model could distinguish draft, submitted, awaiting clarification, under review, resolved, and superseded. The names may vary, but each status needs a defined meaning.

    For every status, document who can view it, who can change it, the event that moves it forward, and the exception route when normal review cannot resolve the item. Do not leave responsibility at the level of “the clinical team” or “support.” Assign a role, a queue, and an escalation owner.

    Where a team needs help translating operational requirements into delivery decisions, fractional VP engineering services can provide a structured engineering leadership model for scope, acceptance criteria, and release controls. That support does not replace the clinical, privacy, or operational owners responsible for approving their own decisions.

    Keep the reviewer interface focused

    A reviewer needs usable context rather than an uncontrolled copy of the patient-facing flow. Present the reported information, its source, its version, prior review activity, and only the actions permitted to that role. If staff can edit a value, require the system to record who made the change and why. If they cannot edit it, provide an explicit clarification or correction route instead of relying on messages, spreadsheets, or undocumented workarounds.

    Step 5: Specify privacy, consent, and access controls

    Write data-handling decisions as product requirements rather than adding a policy link near launch. Document the approved purpose for collection, the intended audience for each data state, the roles permitted to access it, the required notice or consent experience, and the retention, deletion, and export decisions that apply to the product. Obtain jurisdiction-specific legal and privacy review before release.

    Access controls should follow the workflow. Define which records a patient may view, which queue items an authorized reviewer may access, and the limited administrative access needed to operate the system. The approved audit design should identify meaningful events to record, such as viewing, editing, exporting, status changes, and permission changes.

    If an AI-enabled feature is proposed, make it a separate scope decision. Microsoft identifies fairness, reliability and safety, privacy and security, inclusiveness, transparency, and accountability as responsible AI considerations.[1] Translate those considerations into specific product requirements: disclose the feature’s role, define the human review point, constrain its permitted actions, and provide a correction route. An AI-generated summary should not be presented as a clinical conclusion or allowed to change patient data automatically.

    Step 6: Set the integration boundary and automation controls

    Decide whether the workflow will stand alone, write to a system of record, export structured information, or support more than one path. For every connection, document the source of truth, allowed data direction, field mapping, validation rules, failure handling, retry behavior, reconciliation process, and accountable owner.

    Use a practical test: an integration is not fully scoped until the team can explain what happens when it fails. Define behavior for a rejected record, duplicated submission, unavailable destination, and mismatched identifier. The launch criteria should state what the patient sees, whether staff receive an exception item, and how the team confirms resolution.

    Compare build, buy, and hybrid options against these operational requirements rather than only the number of form fields. Exitech’s build-vs-buy framework for workflow automation provides a related decision structure for assessing control, integration needs, and long-term ownership.

    For machine-learning components, AWS publishes its Machine Learning Lens as guidance for reviewing machine-learning workloads.[2] Google Cloud describes MLOps guidance for continuous delivery and automation pipelines in machine learning.[3] Use these sources as prompts for internal requirements around evaluation, release control, monitoring, rollback, and ownership; do not treat a model release as a substitute for an approved workflow.

    Generative-AI features also require application-security controls. OWASP’s Top 10 for LLM Applications identifies risks including prompt injection, sensitive-information disclosure, supply-chain vulnerabilities, excessive agency, and insecure output handling.[4] Keep any such capability narrowly bounded and require authorized human review before its output can affect sensitive records or workflow status.

    Step 7: Test operational scenarios before release

    Test both a prototype and the implemented workflow with representative users and approved reviewers. Give participants defined tasks, observe where the planned flow breaks down, and convert material findings into changes to requirements, copy, states, or acceptance criteria.

    Include incomplete entries, uncertain answers, duplicate information, corrections after submission, interrupted sessions, shared-device use, account recovery, missing permissions, unavailable integrations, and reviewer follow-up. Test the audit trail as a task: an authorized user should be able to determine what changed, when it changed, and which role made the change under the approved audit design.

    For an AI-enabled capability, retain a written risk decision with the product requirements. The NIST AI Risk Management Framework presents Govern, Map, Measure, and Manage as functions for managing AI risks.[5] Apply the framework proportionately to the feature and document the accountable owner, evaluation approach, review point, and release decision.

    Verification Checklist

    • The intake purpose and out-of-scope clinical boundary are documented and approved.
    • The patient journey, staff journey, statuses, and exception paths are mapped.
    • The data model distinguishes patient-reported, reviewed, corrected, and imported information.
    • Uncertainty, free text, provenance, timestamps, and version history have defined handling.
    • Privacy, access, audit, retention, and export decisions have named owners.
    • Each integration has a source of truth, failure path, reconciliation process, and accountable owner.
    • Accessibility, security, operational, and representative-user test cases appear in acceptance criteria.
    • Any AI feature has separate governance, evaluation, monitoring, and human-review requirements.

    Common Mistakes

    • Treating intake as a one-time form: design for corrections, clarification, and a visible change history.
    • Forcing a precise answer: keep unknown answers, omitted answers, and incomplete drafts as distinct states where the approved workflow requires them.
    • Mixing reported and reviewed data: preserve the source and review status so authorized users can understand the record’s context.
    • Leaving exceptions outside the product: document queues and escalation paths rather than relying on informal messages or spreadsheets.
    • Adding AI before defining controls: establish purpose, permissions, review, monitoring, and correction paths first.
    • Choosing an integration late: system-of-record decisions affect the data model, permissions, testing, and launch criteria.

    Next Action

    Turn the completed family health history checklist into a product requirements document with user journeys, data definitions, permissions, integration decisions, acceptance criteria, and named approvers. Exitech can help product teams move from workflow discovery to a scoped design and engineering plan while keeping delivery decisions visible from the first workshop. Define the approved workflow, establish the controls, and build to the product boundary your organization has accepted.

    References

    1. [1] https://www.microsoft.com/en-us/ai/principles-and-approach
    2. [2] https://docs.aws.amazon.com/wellarchitected/latest/machine-learning-lens/machine-learning-lens.html
    3. [3] https://cloud.google.com/architecture/mlops-continuous-delivery-and-automation-pipelines-in-machine-learning
    4. [4] https://owasp.org/www-project-top-10-for-large-language-model-applications/
    5. [5] https://www.nist.gov/itl/ai-risk-management-framework

  • Demo: Publishing guide (stale) — edited by a human

    Build a reliable publishing process

    Start with a clear brief. Review the article before it goes live.

    Keep the source evidence close to the claim.

    Read the source guide.

  • Custom Sales Software Development: A Practical Scoping Guide

    Custom Sales Software Development: A Practical Scoping Guide

    Custom sales software development should produce a usable first-release plan: one defined revenue workflow, named users, clear data responsibilities, operational reporting questions, and a route to launch. This guide is for founders, revenue leaders, and product teams whose sales process involves specialist handoffs, multiple roles, disconnected systems, or rules that standard CRM configuration does not represent well.

    The goal is not a long feature wish list or a replica of an existing CRM. It is the smallest useful product that helps a team run an important sales workflow with clarity and control. Work through the steps in order so that decisions about design, engineering, testing, and launch are based on how the work actually happens.

    Before you start

    Bring examples from the current process, not only a future-state diagram. Gather:

    • Three to five representative opportunities, including a straightforward path and a difficult exception.
    • A list of participating roles, such as sales representatives, managers, operations staff, dealers, finance reviewers, and administrators.
    • The systems used today, the information each holds, and the person accountable for that information.
    • One business decision the new software should make easier, such as assigning an enquiry, approving a commercial exception, identifying a stalled proposal, or handing an accepted order to operations.
    • A product owner who can resolve scope trade-offs.

    Start with real work rather than dashboards, automations, or integration labels. Software should support a sequence of decisions and actions, not simply collect fields.

    Step 1: Map the sales workflow before specifying screens

    Document the workflow from its trigger to its outcome. A workflow is the ordered path through which work moves, including decisions, ownership changes, and exception handling. A trigger might be a web enquiry, inbound call, dealer referral, or renewal notice. An outcome might be a qualified opportunity, sent proposal, accepted order, closed-lost record, or account-team handoff.

    For every stage, record the action that moves work forward, the responsible user, the information required, the decision or approval involved, and the resulting state. A state is a condition the product can recognize, such as awaiting qualification, proposal under review, approved for order, or returned for correction. These definitions are more useful than generic pipeline labels because they establish what users can do next.

    Capture handoffs and exceptions

    Map each handoff directly. A representative may create an opportunity, an operations colleague may verify a requirement, a manager may approve a non-standard term, and an administrator may create a downstream record. Identify what the next person receives, what they must confirm, and what happens if required information is missing.

    Record exceptions without attempting to automate all of them in the first release. A deal may require a different approval path, a customer may request a revised proposal, or a duplicate contact may be discovered after qualification. Each case may need a visible status, named owner, notification, or manual resolution route.

    Test the map with a realistic scenario: a dealer submits a lead; a representative qualifies it; operations confirms a requirement; a manager approves a special term; the representative sends a proposal. If the team cannot identify the actor, record, state, and next action at every point, the workflow is not ready for detailed software scope.

    Step 2: Define the smallest workflow worth building

    Choose one high-friction workflow for the first release. A practical boundary is narrow enough to design, build, test, and launch with confidence, while still completing meaningful work. It could cover enquiry intake through qualified proposal, or accepted proposal through order handoff. It does not need to include every channel, territory, sales motion, historical record, or analytics request immediately.

    Sort proposed capabilities into three groups: required for the selected workflow, required to operate responsibly, and suitable for a later release. Assigning an enquiry and recording a qualification decision may be workflow requirements. Restricting who can approve a commercial exception may be an operational requirement. Advanced forecasting or a customer portal may be later work.

    Write acceptance criteria in observable language. Rather than stating that the product should handle approvals, specify that a representative can request an exception, a manager can approve or decline it, the decision and reviewer remain attached to the opportunity, and the representative can see the outcome. These statements create a shared test for business stakeholders, designers, and engineers.

    If the earlier decision is whether to extend a current tool, combine several tools, or build a new product, use Build vs. Buy for Workflow Automation: A Framework for AI, SaaS, and Custom Software. That is a separate decision from scoping a custom solution. Once a custom route is justified, define the smallest responsible product boundary.

    Step 3: Design roles, permissions, and records

    Create a permissions matrix before finalizing interface design. A permissions matrix lists what each role can view, create, edit, approve, export, or administer. Define roles by responsibility rather than job title alone. Two people with the same title may require different access when one manages a region or handles commercial approvals.

    Start with the records the product must manage. They may include contacts, accounts, leads, opportunities, proposals, products, approvals, activities, and orders. For each record, define its owner, which fields can change in each state, and who can view sensitive information. Be specific about commercially significant actions, including deleting a record, changing ownership, marking a deal closed, exporting data, or overriding an approval.

    Use access rules to clarify operating decisions

    For example, a representative might edit an opportunity during qualification and submit it for approval when a non-standard term is requested. A manager can make the approval decision but cannot silently revise customer notes. An administrator can correct a duplicate account but cannot alter a recorded approval. These are product rules to define before testing, not details to defer until the end.

    Also decide what users see when they cannot act: a read-only view, the name of the next owner, or no visibility. This makes blocked handoffs visible in the product design.

    Step 4: Decide what the product owns and what it integrates with

    Make a system-of-record decision for every important data object. A system of record is the authoritative location where a defined type of data is maintained. A custom sales product may own opportunity states and approval history, while accounting software owns invoices and a marketing platform owns campaign attribution. A new interface does not automatically need to become authoritative for all customer data.

    For every integration, document the direction of data movement, trigger, fields exchanged, identity used to match records, and action taken when the connection fails. “Integrate with accounting” is not sufficient scope. A usable requirement is: “Create an order in the accounting system when an approved proposal is accepted, retain the returned order identifier, and show a retry state if creation fails.”

    Decide how the workflow behaves when external data is late, unavailable, or inconsistent. A representative may need to save work while an availability check is unavailable. An operations user may need a queue for records requiring correction. Defining these paths avoids making core sales work dependent on unexamined assumptions about another system.

    When the product primarily supports employees, specialists, or administrators, Custom Internal Tools Development: A Practical Guide provides related planning methods for operational interfaces. Keep the scope anchored to the selected revenue workflow.

    Step 5: Make reporting part of the workflow design

    Define the operational question before designing a report. “Which opportunities have been waiting for manager review?” supports a specific action. “How many records do we have?” may not. Reporting requirements should identify the decision, the user making it, and the information needed to make it.

    Then identify the events the product must record. To review time spent in approval, the workflow needs a submission timestamp, decision timestamp, current status, and defined owner. To identify where opportunities stop progressing, it needs consistent stage changes and definitions for closed, stalled, and returned work. Dashboard design cannot compensate for missing events or ambiguous definitions.

    Assign data-quality responsibilities. Decide who resolves duplicates, who can amend an incorrect stage, whether important edits are logged, and how incomplete records are handled. Keep first-release reporting focused on the decisions tied to the selected workflow; expand analysis after the team has evidence about what information is captured reliably.

    Step 6: Specify the technical delivery plan

    Turn the scoped workflow into a delivery plan covering interface design, engineering, testing, deployment, and support. Identify the user journeys to design, records and business rules to implement, APIs or imports needed for integrations, test scenarios that prove acceptance criteria, and people responsible for release decisions.

    Test rules through realistic scenarios rather than isolated fields. Include a standard path, rejected approval, missing external record, duplicate customer, unauthorized action, and handoff to another role. Document the expected result for each scenario. This tests the operating process as well as the interface.

    If the product includes AI capabilities, such as drafting a follow-up or summarizing account information, define the allowed action, source data, human review point, and failure path. Microsoft identifies fairness, reliability and safety, privacy and security, inclusiveness, transparency, and accountability as responsible-AI considerations.[1] The NIST AI Risk Management Framework describes a framework for managing AI risk across the lifecycle.[2]

    AI features also require application-security review. OWASP identifies risks for large-language-model applications that include prompt injection, sensitive-information disclosure, insecure output handling, and excessive agency.[3] AWS describes machine-learning workload considerations including operational excellence, security, reliability, performance efficiency, cost awareness, and lifecycle governance.[4] Google Cloud’s MLOps guidance covers automated validation, pipelines, deployment controls, monitoring, and continuous improvement.[5]

    Step 7: Validate with real users and prepare for iteration

    Review the proposed product with the people who will use it. Walk through scenarios instead of presenting static screens alone. Ask a representative to qualify a realistic lead, an approver to handle an exception, and an operations user to complete the downstream handoff. Note where users hesitate, which information they seek, and which terms they interpret differently.

    Start rollout with a defined group, workflow, or segment when practical. Name a feedback owner, a route for defect reports, and a method for prioritizing improvement requests. Keep the post-launch backlog separate from first-release acceptance criteria so that new evidence can inform subsequent work without reopening decisions already required for launch.

    Plan ownership after release: monitoring integration failures, answering access requests, maintaining business definitions, and moving approved changes into later releases.

    Verification checklist

    • The first-release workflow has a documented trigger, states, actions, handoffs, exceptions, and outcome.
    • Each capability is classified as first-release, operationally necessary, or later work.
    • Acceptance criteria state observable actions and expected results.
    • Roles and permissions define who can view, create, edit, approve, export, and administer important records.
    • Each key data object has a named system of record and accountable owner.
    • Every integration specifies direction, trigger, field mapping, matching logic, and failure handling.
    • Reports begin with operational questions and required events.
    • Testing includes standard, exception, access-control, and integration-failure scenarios.
    • Rollout, support, feedback, and post-launch backlog ownership are assigned.

    Common mistakes to avoid

    • Copying a CRM without mapping the work. Existing screens do not establish that the workflow or terminology fits your team.
    • Automating every exception first. Record exceptions and provide a manual route; automate cases required by the selected workflow.
    • Leaving data ownership unclear. Conflicting customer, opportunity, and order records require a product decision as well as an integration decision.
    • Requesting dashboards before defining events. Reports cannot resolve undefined stages or missing timestamps.
    • Treating permissions as a final task. Access rules shape handoffs and user experience from the beginning.
    • Treating launch as the end of ownership. Support, monitoring, feedback, and controlled iteration need named owners.

    Next action: turn the workflow into a build brief

    Prepare a concise brief containing the workflow map, first-release boundary, roles and permissions, records and integrations, reporting questions, acceptance scenarios, and ownership plan. If you are assessing delivery partners, read How to Choose a Sales Software Development Company to structure that conversation. Exitech can help translate a complex sales process into a practical product strategy, delivery scope, and build plan. Start with the workflow your team most needs to run well.

    References

    1. [1] https://www.microsoft.com/en-us/ai/principles-and-approach
    2. [2] https://www.nist.gov/itl/ai-risk-management-framework

    3. [3] https://owasp.org/www-project-top-10-for-large-language-model-applications/
    4. [4] https://docs.aws.amazon.com/wellarchitected/latest/machine-learning-lens/machine-learning-lens.html
    5. [5] https://cloud.google.com/architecture/mlops-continuous-delivery-and-automation-pipelines-in-machine-learning
  • Custom Internal Tools Development: A Practical Guide

    Custom Internal Tools Development: A Practical Guide

    Custom internal tools development should give a team a usable operational loop: a clear queue of work, defined actions, access to the right information, and a reliable path for exceptions. It should not simply reproduce an existing spreadsheet in a browser.

    This guide is for founders, operations leaders, and product teams that have decided to explore a tailored tool for a high-friction workflow. It explains how to prepare and deliver an internal application for sales, operations, marketplaces, recruitment, finance, support, or specialist administration.

    The practical outcome is a focused first release with defined workflow boundaries, accountable owners, appropriate access rules, and a maintainable plan for operation after launch.

    Before You Start

    Bring evidence of current work before discussing screens, platforms, or a feature list. A useful discovery process starts with real examples rather than assumptions about how work should happen.

    • Representative users who perform the work regularly.
    • A recent item that moved from the workflow trigger to its final outcome.
    • The systems, spreadsheets, inboxes, forms, and documents currently involved.
    • A decision-maker who can resolve scope trade-offs.
    • Known access, data-handling, integration, timing, and operational constraints.

    Start with work that is delayed, duplicated, hidden, or difficult to review. Do not begin by collecting every feature someone might want.

    Step 1: Map One Custom Internal Tools Development Workflow

    Choose one workflow and map it from trigger to outcome. For this guide, a workflow is the repeatable sequence through which a team moves a piece of work forward. It may begin with a submitted request, incoming lead, document, scheduled event, or stock change. It ends when the work is completed, handed over, declined, cancelled, or closed.

    Write the path in plain language before creating a delivery backlog. Identify the trigger, each role, the decisions made, the information required, the handoffs, and the final state. Capture routine exceptions as part of the same map. An operations request may need reassignment, missing information, escalation, cancellation, or correction after review.

    Use a recent example rather than an ideal process

    Walk through an actual item with the people who handled it. Ask what happened first, what they checked, where they waited, and how they knew the item was ready for the next person. This exposes informal work that diagrams often omit, such as messages outside the main system, undocumented approval rules, and manual reconciliation.

    Create a short workflow statement that can be tested: “When a dealer submits a request, operations validates the record, assigns an owner, requests missing documents, records an approval or rejection, and closes the item.” This is a more useful delivery boundary than a broad request for a dashboard.

    If the investment decision is not yet made, review the separate build-versus-buy framework for workflow automation before committing to implementation. Once the decision is made, keep the project focused on the selected workflow.

    Step 2: Define Roles, Decisions, and Permissions

    Document what each role may see and do. Role-based access control is an approach in which permissions are assigned to roles and people are assigned to those roles. Build a simple matrix for each role and record whether it can view, create, edit, assign, approve, export, or delete each important record type.

    Also specify which records each role can access. A regional manager may need records for a defined area. An administrator may configure statuses but not approve a financial decision. A contributor may submit a request but not alter its final disposition. These distinctions should be visible in the requirements, not left for an engineer to infer from screens.

    For sensitive actions, name the responsible role and decide whether the application must retain an operational history of who acted, when, and why. Apply these controls where the workflow needs them rather than adding generic tracking to every interaction.

    Set explicit boundaries for AI-assisted actions

    If the tool uses AI to summarize, classify, or suggest next steps, state whether the output is advisory or permitted to trigger a workflow action. Define the human review point and the information the feature may use. Microsoft identifies fairness, reliability and safety, privacy and security, inclusiveness, transparency, and accountability as considerations in responsible AI delivery.[1] Use those considerations to make the feature’s limits understandable to users and owners.

    Test permissions with realistic accounts during acceptance testing. The question is practical: if an account is used incorrectly or compromised, what information and actions should remain unavailable?

    Step 3: Create a Data and Integration Map

    Inventory data sources before designing the interface. An internal tool may connect to a customer relationship management platform, accounting system, ecommerce platform, identity provider, document store, or existing database. For each important entity, such as a customer, order, application, supplier, case, or task, record the source system, identifier, owner, required fields, and direction of data movement.

    Decide whether the tool reads data, writes data, or both. Define the authoritative source for each key field and what should happen when a connected system is unavailable, returns incomplete information, or conflicts with another record. Use a stable identifier supplied by the connected system as the joining mechanism where possible, and make matching rules explicit.

    Specify failure behavior before development

    An integration plan should include its failure behavior. Decide whether a user can save work for later, retry a request, proceed with a visible warning, or must stop and escalate. Error messages should state what failed, what was not changed, and the next available action. Users should not have to guess whether a submission succeeded.

    If the application sends untrusted content to a generative AI service or accepts model output into a business process, include security review early. OWASP identifies risks for large-language-model applications that include prompt injection, sensitive-information disclosure, supply-chain vulnerabilities, excessive agency, and insecure output handling.[2] Turn those risks into specific review questions for the proposed integration.

    Step 4: Scope a Complete First Release

    Prioritize the smallest release that completes the operational loop. A first release should let a defined group receive work, find it, make required decisions, move it through agreed statuses, resolve common exceptions, and close it. It does not need every report, automation, configuration option, or secondary integration discussed during discovery.

    Separate requirements into three groups: essential workflow actions, operational safeguards, and later enhancements. Essential actions are the steps without which work cannot be completed. Safeguards include permissions, validation, error handling, and a support path. Later enhancements may include advanced dashboards, bulk editing, additional exports, or supplementary integrations.

    Write acceptance criteria in observable terms. Instead of saying that a queue should be easy to use, specify that an assigned user can filter open requests by status, open a record, add a required note, submit it for approval, and receive confirmation that the status changed.

    For sales-facing workflows, How to Choose a Sales Software Development Company provides related guidance on evaluating a delivery partner and resolving business questions alongside product scope.

    Step 5: Design for Queues, Clarity, and Exceptions

    Design the work queue before designing the dashboard. A queue is the ordered view of items requiring attention. It should help users see what needs action, why it needs action, who owns it, and what can happen next. For a daily operational tool, that usually matters more than a broad summary screen.

    Define each status in operational language. “Pending” is incomplete unless it identifies what is pending: a customer response, document review, manager approval, payment confirmation, or scheduled execution. A useful status communicates the current condition and the responsible next step.

    Specify the supporting interactions users need: search, filters, sorting, validation at the point of entry, understandable empty states, and record history where the workflow needs it. An empty queue might mean there is no assigned work, filters exclude records, or data failed to load. Each situation needs distinct guidance.

    Make exceptions visible workflow states

    Do not bury routine exceptions in notes or email. Give each common exception a visible state, an owner, and an escalation route. A supplier onboarding process, for example, may need a “missing documentation” state with an explicit request action. This makes work visible and creates a clearer basis for improvement after launch.

    Step 6: Select an Architecture for the Operating Context

    Choose an architecture that matches the tool’s boundaries and ownership model. Start with requirements that affect ongoing operation: authentication, access patterns, integrations, data sensitivity, deployment, backup needs, monitoring, and the team responsible for maintenance.

    Define API boundaries clearly. In this guide, an application programming interface, or API, is the contract through which software components exchange requests and responses. Clear boundaries make the relationship between the tool and connected systems easier to review. Keep business rules in deliberate locations rather than duplicating them across screens, scripts, and integrations.

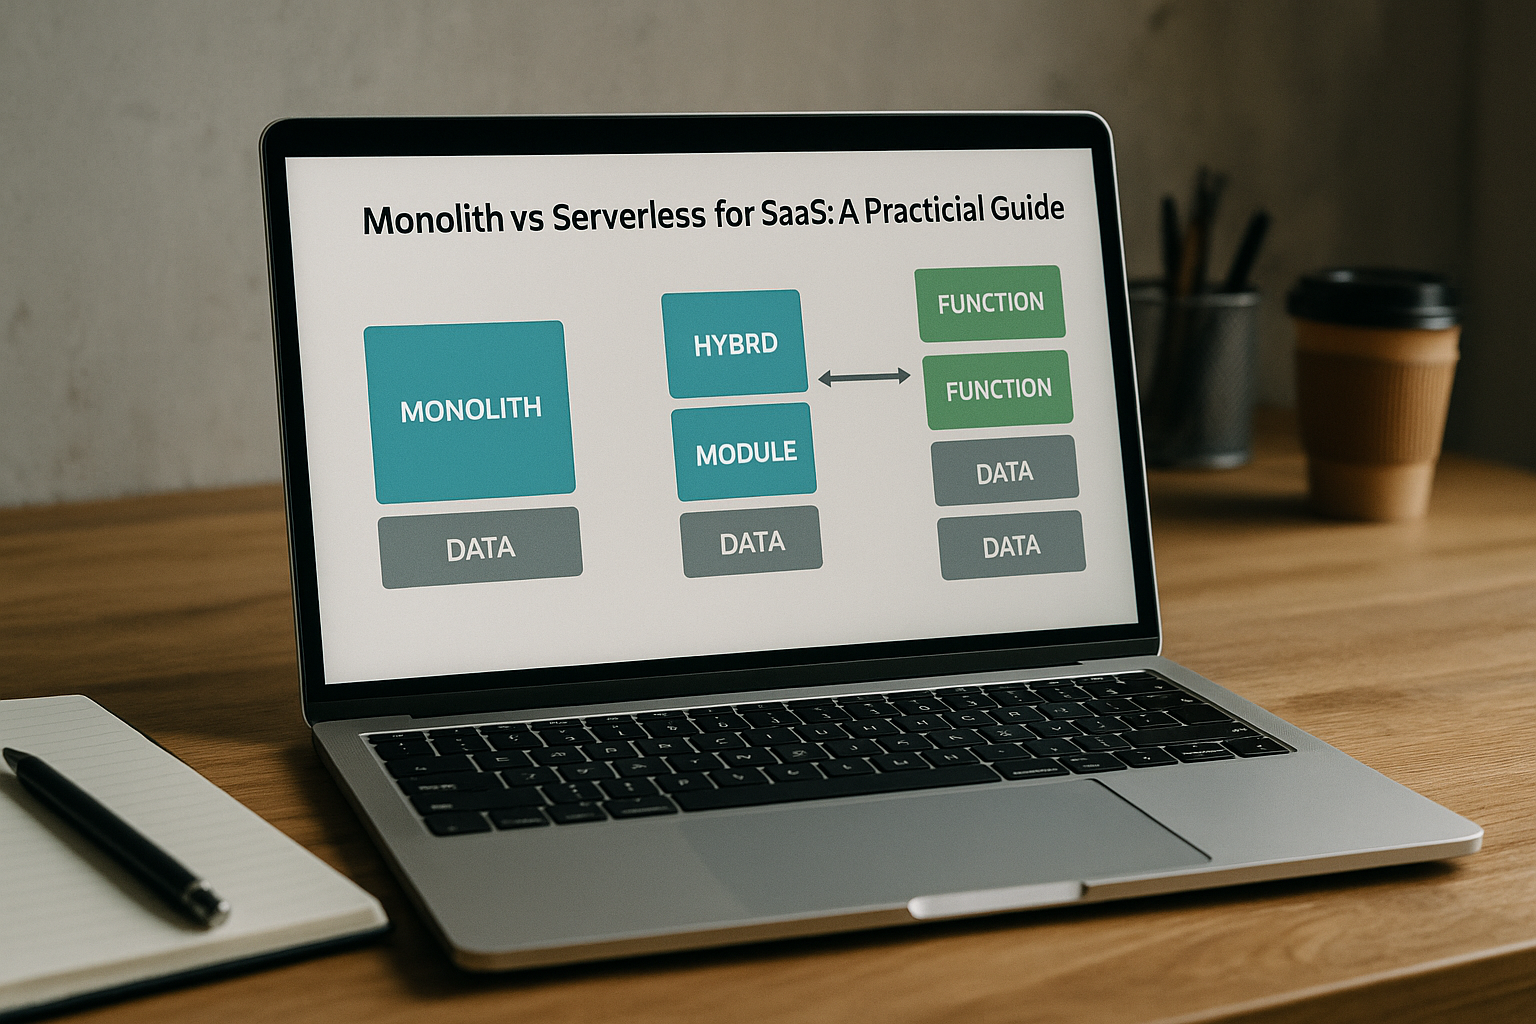
    There is no universal application shape. For planning purposes, a monolith places related application functions in one deployable system, while a serverless approach uses managed execution for discrete functions. Teams weighing those approaches can review Monolith vs Serverless for SaaS: A Practical Guide. Select an approach the responsible team can deploy, observe, secure, and change.

    If machine-learning components are in scope, plan their operational controls as part of the architecture. AWS’s Machine Learning Lens addresses operational excellence, security, reliability, performance efficiency, cost awareness, and lifecycle governance for machine-learning workloads.[3]

    Step 7: Build With Feedback Loops and Production Controls

    Review working software with representative users throughout the build. Use realistic records and scenarios rather than only polished demonstrations. Ask users to complete a normal task, find an exception, correct invalid input, and respond to an integration problem. Record what they do as well as what they say.

    Maintain a visible list of accepted requirements, open decisions, defects, and deferred enhancements. Regular demonstrations give decision-makers opportunities to resolve trade-offs while the scope is still being shaped. They also help prevent informal meeting requests from becoming assumed requirements.

    Prepare a release plan before the first production deployment. Name the release owner, included users, data migration or setup tasks, support contact, monitoring checks, and rollback decision. A rollback is a controlled return to a previous stable version when a release creates an unacceptable operational problem.

    For machine-learning delivery, Google Cloud describes MLOps practices involving automated validation, pipelines, deployment controls, monitoring, and continuous improvement.[4] Apply comparable discipline in proportion to the internal tool’s use of model outputs.

    Step 8: Assign Ownership and Improve After Launch

    Name product, operational, and technical owners before launch. The product owner resolves priorities and scope questions. The operational owner represents the people doing the work and maintains process definitions. The technical owner is responsible for application health, access administration, deployments, and planned changes. One person may hold multiple roles, but the responsibilities should remain explicit.

    Create a straightforward intake path for support requests and improvement ideas. Capture the user, workflow step, record type, impact, and desired outcome. This helps distinguish defects from training issues, permission requests, and genuine product enhancements.

    Review the tool using evidence from real use: recurring exceptions, support themes, blocked work, manual workarounds, and requested changes. For AI-supported workflows, the NIST AI Risk Management Framework provides a framework for considering governance, measurement, risk review, transparency, and trustworthy AI delivery across the lifecycle.[5]

    Verification Checklist

    • The first release covers one workflow from trigger to a defined end state.
    • Each status has a clear meaning, owner, and next action.
    • Permissions specify what each role can view, create, change, approve, and export.
    • Important data entities have a source, identifier, and named owner.
    • Integrations have defined success, failure, retry, and escalation behavior.
    • Representative users have tested normal work and realistic exceptions.
    • The release plan includes support, monitoring, and rollback responsibilities.
    • Product, operational, and technical ownership are assigned after launch.
    • Deferred work is retained in a prioritized backlog rather than added casually to the first release.

    Common Mistakes to Avoid

    • Digitizing an unclear process: map triggers, decisions, handoffs, and exception routes first.
    • Copying a spreadsheet exactly: retain necessary data but redesign the flow around the actions users must complete.
    • Giving broad access by default: derive permissions from responsibilities and test them.
    • Integrating before assigning data ownership: define authoritative records and failure behavior first.
    • Treating exceptions as edge cases: give recurring exceptions a visible route through the tool.
    • Launching without an operating owner: the application needs ongoing decisions, support, and maintenance.

    Next Action

    Bring one real workflow, a representative user, and the systems involved to an initial planning discussion. Exitech can help turn that material into a workflow map, a scoped first release, and a technical approach your team can operate after launch. Start with the work that matters most, define the boundaries, and build the smallest useful loop.

    References

    1. https://www.microsoft.com/en-us/ai/principles-and-approach
    2. https://owasp.org/www-project-top-10-for-large-language-model-applications/
    3. https://docs.aws.amazon.com/wellarchitected/latest/machine-learning-lens/machine-learning-lens.html
    4. https://cloud.google.com/architecture/mlops-continuous-delivery-and-automation-pipelines-in-machine-learning
    5. https://www.nist.gov/itl/ai-risk-management-framework

  • How to Choose a Sales Software Development Company

    How to Choose a Sales Software Development Company

    A sales software project should give you a decision-ready delivery plan, not an unprioritized feature list. This guide is for founders, sales leaders, revenue operations teams, and product owners considering a custom sales application, dealer portal, workflow layer, or integration.

    Use it before engaging a sales software development company. The practical outcome is a brief that explains the workflow to improve, the systems involved, the decisions that need ownership, and the conditions a first release must meet. That gives prospective partners enough context to assess the work without forcing an early technology choice.

    Before You Start: Gather the Operating Inputs

    Start with concrete examples of how work moves through your sales process. Do not wait for complete documentation. A recent opportunity, proposal, approval, or handoff is usually a better starting point than an abstract requirements document.

    • One or two examples of a lead, opportunity, proposal, approval, order, or renewal moving through the current process.
    • A list of people who create, review, approve, depend on, or administer sales information.
    • The current systems involved, including the owner of each system and any known integration constraints.
    • Manual workarounds, repeated data entry, reporting gaps, delays, and exceptions.
    • Known policies, customer commitments, required approvals, and target timing constraints.

    These inputs are discovery material, not a commitment to build a particular application. Their purpose is to make the operating context visible before a feature backlog takes over the conversation.

    Step 1: Map the Sales Workflow Before Discussing Features

    Draw the work from trigger to outcome. Begin with the event that creates work: an inbound enquiry, partner referral, renewal signal, field visit, or request for a quote. Follow it through qualification, assignment, follow-up, review, proposal preparation, approval, contract handoff, and any downstream fulfilment or account-management activity.

    For each stage, record the person responsible, the decision being made, the information needed, the system used, the resulting status, and the exception path. A map should show more than the preferred path. Include duplicate records, changes in ownership, missing information, non-standard discounts, multiple customer contacts, and delayed updates from another system where those situations matter.

    Separate activities from decisions

    Describe activities and decisions separately. “Create proposal” is an activity. “Decide whether a non-standard commercial term requires approval” is a decision. This distinction helps a delivery team identify where the product needs a simple interface and where it needs rules, evidence, permissions, notifications, or a retained history of action.

    Include users outside the sales team. Finance, legal, operations, partner administrators, service teams, and system administrators may all affect a sales workflow. Use a real scenario to test the map. For example, trace a partner-submitted opportunity that requires management review, an inventory check, and a customer-facing proposal. The scenario makes required records, edit rights, and system boundaries easier to discuss.

    Step 2: Define the Business Problem and Success Conditions

    Write the operational change before naming the feature. State what should become easier, more consistent, more visible, or more controlled. “Build a dashboard” and “add an AI assistant” are solution ideas, not problem statements. Start instead with the work a user must be able to complete.

    For each problem, write observable conditions that stakeholders can review. A manager may need to review an exception without leaving the workflow. A partner may need to submit only the information required for a request. An operations user may need to identify records waiting for a defined action. These conditions describe expected behaviour without promising commercial results.

    Then separate assumptions from constraints. An assumption might be that the current customer relationship management system, or CRM, will remain the reference for customer records. A constraint might be that only approved users can view a pricing field. Both affect delivery, but assumptions should be tested while constraints should be confirmed with the people accountable for them.

    Name one business owner who can resolve priority questions. A development partner can expose trade-offs and document decisions, but the client team must decide which operational outcome takes precedence when requests conflict.

    Step 3: Decide What Should Be Custom, Configured, or Integrated

    Choose the smallest practical intervention for each workflow. A sales process can combine existing platform configuration, workflow automation, an integration layer, and focused custom software. Evaluate those choices workflow by workflow rather than assuming every part of the process belongs in a new application.

    Configuration may fit a stable workflow that the existing system represents clearly. Automation may fit a repeatable action with defined inputs, outputs, and ownership. A custom interface or portal may be appropriate to evaluate when specialized users need a focused experience, when a sequence crosses several systems, or when permissions and rules cannot be maintained clearly in the current tools.

    Integration work defines how systems exchange and reconcile the information needed for a workflow. It may be the right scope when users can remain in their current systems but need a shared status or dependable transfer of selected data. For a broader decision framework, review Exitech’s Build vs. Buy for Workflow Automation framework.

    Use a boundary test

    For every proposed custom feature, ask: can the current system support this clearly; who will maintain it; what data must cross a system boundary; and what should users do if the capability is unavailable? The answers help distinguish a necessary workflow change from a preference for a new screen.

    Step 4: Specify the Sales Software Scope in Releases

    Turn the workflow map into a prioritized release plan. Define the first usable workflow rather than listing every future improvement. Describe each scoped item through its user, trigger, action, information required, expected outcome, and acceptance criteria.

    Start with the core path: the smallest end-to-end sequence that must work for a named role. Then identify supporting capabilities such as search, notifications, exports, approvals, record history, and administration. Listing these separately exposes dependencies and prevents essential operational needs from disappearing inside a broad request to “build the workflow.”

    Define roles precisely. In this brief, a role means a documented set of allowed actions and data visibility. A sales representative may create and update assigned opportunities; a manager may approve defined exceptions; an administrator may manage users and reference data. Record both what each role may do and what it must not view, edit, export, or approve.

    Include reporting needs early. Identify the question a report must answer, the user responsible for acting on it, the data source, and the required level of freshness. “A reporting dashboard” is too broad to assess. “A manager can review requests awaiting approval, grouped by owner and age” is a testable starting point.

    Use explicit categories such as required for the first release, valuable but deferred, and out of scope. Deferred work remains visible without silently expanding the first release.

    Step 5: Set Integration, Data, and Security Boundaries

    Assign ownership for every important data type. For the project, designate the application that holds the authoritative record for customer details, product availability, pricing, agreements, and other important information. Ownership can differ by data type, so document it instead of treating one platform as the default source for everything.

    For each integration, record the synchronization direction, trigger, fields exchanged, identifier used to match records, and expected response to a failed update. Decide whether users may edit the same field in more than one system. If they may, agree a conflict rule before development begins. This gives the team a defined behaviour to build and test when systems disagree.

    Make access control part of the release scope. Document which roles may view, create, update, approve, export, and administer each sensitive record or action. Where retained history is required, specify the events to record and the user action associated with each event.

    Define extra controls for AI-enabled workflows

    If the product includes an AI feature, define its allowed inputs, intended output, human review point, and failure path. Microsoft describes responsible AI through fairness, reliability and safety, privacy and security, inclusiveness, transparency, and accountability.[1] Use those areas as review prompts when deciding what an AI-assisted sales workflow may do and what requires human confirmation.

    For generative AI functions, include explicit review of prompt injection, sensitive-information disclosure, excessive agency, and insecure output handling. OWASP includes these topics in its guidance for large-language-model applications.[2] NIST’s AI Risk Management Framework can provide a structure for documenting governance, measurement, review, and transparency through the lifecycle.[3]

    Step 6: Evaluate a Sales Software Development Company by Delivery Evidence

    Evaluate how a partner will reduce uncertainty, not only the technologies it lists. Ask prospective partners how they would validate the workflow, clarify ambiguous rules, design for each user group, and test integration behaviour. Their response should connect discovery, design, engineering, quality assurance, deployment, and support.

    Ask for the proposed discovery outputs. These may include a workflow map, prioritized release scope, data-boundary document, prototypes for high-risk screens, and a technical approach. Ask who participates, how decisions are recorded, and what you can review before substantial development begins.

    Agree operating practices for communication: a demonstration rhythm, decision owners, an escalation route, and a method for recording delivery risks and scope changes. This creates regular points at which business stakeholders can confirm that the work still reflects the intended workflow.

    If the work also needs interim engineering leadership, compare responsibilities with Exitech’s Fractional VP Engineering Services guide. Establish who owns architecture choices, internal technical alignment, and stewardship after the initial release.

    Step 7: Turn the Scope into a Delivery Plan

    Agree milestones around decisions and working outcomes. A delivery plan can begin with discovery and validation, continue through a first release, and include launch preparation plus post-launch improvement. For each milestone, name the owner, expected artefact or working capability, acceptance criteria, review point, and unresolved decision.

    Acceptance criteria state how a requirement will be checked. For an approval workflow, criteria can identify who submits a request, who approves it, which status is visible, which notification is expected, and what happens after a rejection. This provides a shared review standard without prematurely prescribing implementation details.

    Include a change-control approach. New information is expected during delivery; unrecorded scope changes make planning difficult. Decide how requests will be documented, assessed against current priorities, and accepted, deferred, or declined. Protect the coherence of the first release.

    If the work becomes a SaaS product or a significant platform component, use Monolith vs Serverless for SaaS to frame an architecture discussion. Assess the workflow, integrations, operational needs, and product boundary before choosing an architecture label.

    Step 8: Prepare for Launch and Iteration

    Define operational readiness before release. Name the users receiving access, the onboarding material they need, the support owner, the route for reporting issues, and the team authorized to make production changes. Identify records and integrations that require reconciliation as part of launch preparation.

    Set a feedback process around real workflow use. Collect specific observations: where a user stopped, which required information was unavailable, whether a handoff was clear, and which exception did not fit the documented process. Put validated findings into a maintained backlog with an owner and priority.

    If machine learning is part of the product, plan beyond model release. AWS’s Machine Learning Lens identifies operational excellence, security, reliability, performance efficiency, cost awareness, and lifecycle governance as considerations for machine-learning workloads.[4] Google Cloud’s MLOps guidance addresses automated validation, pipelines, deployment controls, monitoring, and continuous improvement.[5]

    For any sales product, retain clear ownership for incidents, integration review, backlog decisions, and production changes. Launch begins the operating phase; it does not remove the need for product decisions.

    Verification Checklist

    • The current and target workflows include decisions, handoffs, exceptions, and non-sales users.
    • Business problems and observable success conditions are documented separately from proposed features.
    • Each major workflow has an explicit configuration, automation, custom-software, or integration decision.
    • The first release has defined roles, core paths, acceptance criteria, dependencies, and exclusions.
    • Data ownership, synchronization rules, failure handling, and access controls are agreed.
    • The delivery plan identifies milestone outputs, decision owners, review points, and change control.
    • Launch readiness includes access, onboarding, support, production changes, and feedback collection.

    Common Mistakes to Avoid

    • Starting with screens instead of workflow. An interface cannot resolve an undefined handoff or approval rule.
    • Treating the CRM as the only requirements source. Include approvers, partners, finance, operations, and connected systems.
    • Leaving integration failure cases undefined. Define the response when records do not match or an update cannot complete.
    • Using vague permissions. Document actions and data visibility by role rather than relying on a broad “admin” label.
    • Treating launch as the finish line. Assign support, issue ownership, and improvement decisions before release.

    Next Action: Bring the Workflow to a Focused Consultation

    Bring your workflow map, system landscape, and highest-risk handoffs to an Exitech consultation. Exitech can help turn those inputs into a focused scope covering product strategy, user experience, engineering, deployment, and ongoing support, so you can assess a sales software development engagement before committing to a build.

    References

    1. https://www.microsoft.com/en-us/ai/principles-and-approach
    2. https://owasp.org/www-project-top-10-for-large-language-model-applications/
    3. https://www.nist.gov/itl/ai-risk-management-framework
    4. https://docs.aws.amazon.com/wellarchitected/latest/machine-learning-lens/machine-learning-lens.html
    5. https://cloud.google.com/architecture/mlops-continuous-delivery-and-automation-pipelines-in-machine-learning
  • Monolith vs Serverless for SaaS: A Practical Guide

    Monolith vs Serverless for SaaS: A Practical Guide

    Choosing an architecture for a SaaS product is a delivery decision before it is a technology preference. The useful outcome is an architecture your team can build, operate, and change while it learns what customers need.

    This guide is for founders and product leaders planning a new SaaS product, rebuilding an early application, or evolving an existing one. Use it to select a modular monolith, serverless functions for selected workloads, or a deliberate hybrid for the next product milestone rather than an imagined end state.

    Before you start

    Gather the information that materially affects the architecture decision before comparing frameworks or cloud services. Architecture cannot resolve an unclear product boundary or an undefined operating model.

    • The primary user journeys that must work in the next release.
    • The core business data and the points where related changes must succeed together.
    • Known integrations, scheduled jobs, file processing, notifications, and reporting needs.
    • Expected workload patterns, including work triggered by events or uneven demand.
    • The people responsible for deployment, monitoring, incident response, and change review.
    • Constraints involving customer isolation, sensitive information, auditability, or third-party dependencies.

    Keep inputs specific. “We need to scale” is not yet a decision criterion. “Users upload files that must be validated and processed without holding open their browser request” describes a workload that a team can design and test.

    Step 1: Map the SaaS product into bounded capabilities

    Separate product capabilities before deciding deployment units. A capability is a coherent area of product behavior, such as account administration, subscription management, order processing, reporting, or an external-system integration. A capability is not automatically a microservice, database, or serverless function.

    Start with a primary user journey. A B2B SaaS customer might invite a colleague, configure a workspace, submit a request, review an outcome, and export a report. That journey can reveal capabilities such as identity and access, workspace configuration, the core workflow, notifications, reporting, and exports. Then identify the data each capability creates, reads, or changes.

    For this guide, a modular monolith is one deployable application organized internally into modules with explicit responsibilities. A serverless function is an independently deployed unit of execution invoked by a request, schedule, or event through a cloud platform. These patterns can coexist because a product boundary and a deployment boundary do not have to be identical.

    Record four items for every capability:

    1. Owner: the product area and engineering responsibility for changes.
    2. Inputs and outputs: the request, event, or data change that starts work and the result it produces.
    3. Data boundary: the records it reads or writes and the changes that need coordinated handling.
    4. Failure behavior: what users, operators, and dependent systems should see when work is delayed, unavailable, or partly complete.

    This exercise helps a team avoid turning every noun in a product brief into a separately deployed component. It also clarifies whether a capability should be custom software at all. Where the decision is whether to build or adopt an automation capability, use Exitech’s framework for build versus buy in workflow automation alongside the architecture review.

    Step 2: Compare monolith vs serverless for SaaS operationally

    Choose an operating model your team can support now. A modular monolith keeps application code, deployment coordination, local development, and debugging in one primary system. A serverless approach places execution across independently deployed functions and cloud-managed triggers. The important question is where the team will perform the operational work, not which label sounds more modern.

    Ask practical questions. Can a developer run the core workflow locally? Can the team trace one customer request through every component it reaches? Can a release be tested against realistic dependencies? Who receives an alert, investigates a failure, and decides whether to retry, compensate, disable an integration, or roll back?

    A modular monolith can be an appropriate starting point when one team is changing closely connected workflows quickly. It should still have internal module boundaries: avoid arbitrary cross-module database access, keep interfaces explicit, and place third-party adapters at the edge of the application. This keeps a later extraction possible without paying the cost of distributed communication before the product boundary is understood.

    Serverless can fit a task with a stable input, a defined output, and a clear failure path. Inbound webhooks, scheduled reconciliations, document conversion, and notification delivery are examples a team may assess. A function still needs tests, logs, access controls, alerts, and an owner for downstream failures.

    For AI-assisted SaaS workflows, the operating model also needs explicit governance. Microsoft describes responsible AI considerations including fairness, reliability and safety, privacy and security, inclusiveness, transparency, and accountability.[1] NIST’s AI Risk Management Framework is a useful reference for organizing AI risk review and measurement across a product lifecycle.[2]

    As the operating model becomes more complex, decision rights and technical accountability need to be explicit. Exitech’s guide to a fractional VP Engineering engagement covers the leadership question that often accompanies architecture, delivery standards, and technical-roadmap decisions.

    Step 3: Classify workloads instead of choosing one architecture everywhere

    Assign a pattern to each workload. A SaaS application commonly contains more than one kind of work. Workload classification makes a hybrid architecture intentional rather than accidental.

    • Interactive request-response workflows: user actions requiring an immediate, understandable result.
    • Transactional workflows: actions that update related business records, such as submitting an order or changing an approval state.
    • Asynchronous processing: work that can continue after a user receives confirmation, such as generating exports or sending notifications.
    • Scheduled jobs: recurring work such as planned synchronization, clean-up, or summaries.
    • Event-driven integrations: work started by an inbound webhook, completed payment, or change in another platform.
    • Variable-demand tasks: isolated work that may arrive unevenly and should not obstruct the core user experience.

    An early SaaS product might keep onboarding, permissions, workflow state, and billing-related records in a modular monolith while using separately invoked functions for webhook intake, document conversion, or scheduled imports. The decision should rest on a stable boundary, a defined failure response, and the team’s ability to operate the component.

    Where an AI or large-language-model feature processes customer input, asynchronous execution alone is not a security control. OWASP’s guidance for LLM applications identifies risks including prompt injection, sensitive-information disclosure, supply-chain issues, excessive agency, and insecure output handling.[3] Record what data can enter the workload, what tools it can call, what output requires review, and what actions output is permitted to trigger.

    Step 4: Evaluate data and integration boundaries

    Decide where consistency and recovery belong before splitting code. Architecture risk often becomes visible at a boundary between data stores, services, or third parties. If a workflow updates a customer record, creates an invoice, and sends a notification, define what outcome is authoritative when one action succeeds and another does not.

    For each cross-boundary interaction, document the source of truth, the identifier used to correlate activity, retry behavior, and the reconciliation path. Design integrations so repeated delivery can be recognized and handled safely. Define how a delayed event is prevented from silently replacing a newer customer decision. These are requirements to test rather than assumptions to leave in queue configuration.

    For multi-tenant SaaS, establish where tenant identity is created, how it travels through background work, and how operational records remain useful without exposing customer information. Treat an external provider as a dependency with its own failure modes, release timing, and data contract.

    For machine-learning workflows, Google Cloud’s MLOps guidance addresses automated validation, deployment controls, monitoring, and continuous improvement rather than treating model release as a one-time activity.[4] Apply equivalent operational thinking whether an AI capability runs inside the main application or behind an event-driven boundary.

    Step 5: Choose the smallest architecture that supports the next milestone

    Make the decision for the next meaningful product milestone. Select the smallest architecture that supports the workflows to be validated and the operational obligations already present. Keep the choice reversible by preserving clear internal interfaces and documenting the assumptions behind it.

    For an early SaaS MVP

    Consider a modular monolith when the core workflow is still being discovered, one team owns most changes, and data relationships are evolving. Organize code by capability, establish a repeatable deployment path, and add structured logs and basic operational checks. Keep potential extraction points visible in module interfaces, but do not add remote calls solely in anticipation of a future state.

    For a workflow-heavy B2B platform

    Keep the stateful workflow and its permissions close to the transactional data. Assess queues or independently invoked tasks for clearly asynchronous work such as exports, notification delivery, or inbound integration processing. Give users a visible status model—such as accepted, processing, complete, or needs attention—rather than leaving them with an indefinitely waiting request.

    For an integration-led product

    Consider isolation around external systems when each integration has distinct credentials, failure modes, or release timing. Preserve a consistent internal domain model instead of allowing a provider’s data shape to spread through the whole application. Define replay and reconciliation before the integration becomes central to a customer workflow.

    For an established application with a concentrated concern

    Extract selectively when a specific module has a persistent, observable reason: a distinct scaling requirement, an independently changing integration boundary, a reliability-containment need, or a separate ownership model. Measure the concern, define the new interface, and assign operational responsibility before moving the component. Replacing an entire application architecture is not required to address one bounded problem.

    If the product question includes whether a managed automation product can replace custom work, revisit the build-versus-buy workflow automation framework. The architecture should follow the work the product must own and the responsibilities the team is prepared to retain.

    Step 6: Write an architecture decision record and migration triggers

    Document the choice in a short architecture decision record. The record should be understandable to product, engineering, and operations stakeholders, and it should remain useful when original assumptions change.

    • Decision: for example, a modular monolith for core workflows with serverless processing for inbound webhooks and scheduled exports.
    • Context: the user journeys, constraints, and workload patterns considered.
    • Consequences: what the decision simplifies, what must be operated, and what is intentionally deferred.
    • Ownership: responsibility for deployments, alerts, dependency changes, and incident decisions.
    • Observability: the logs, metrics, traces, and business-status checks needed to investigate failed work.
    • Migration triggers: observable conditions that justify extracting or redesigning a component.

    A migration trigger describes a condition rather than a hope. “Review reporting extraction when it needs independent release ownership and its data-access contract is defined” creates a testable review point. “Extract when we scale” does not. AWS’s Machine Learning Lens includes operational excellence, security, reliability, performance efficiency, cost awareness, and lifecycle governance among its considerations for machine-learning workloads.[5] Comparable criteria can guide reviews of an AI-related component’s current boundary.

    Verification checklist

    • The selected architecture supports the next product milestone and named user journeys.
    • Every core capability has an owner, data boundary, and defined failure behavior.
    • Asynchronous and event-driven workloads have retry, user-status, and reconciliation handling.
    • The team can test, deploy, observe, and investigate the chosen components.
    • Tenant context, sensitive-data handling, and third-party dependencies have been considered.
    • The decision record names a review point and specific migration triggers.

    Common mistakes

    • Treating serverless as automatically simpler. Managed execution can still create distributed paths that require testing and observability.
    • Treating a monolith as inherently unsuitable. A modular monolith can be a deliberate stage-appropriate choice when its constraints fit the workload and team.
    • Splitting before boundaries are understood. Separate deployments do not create a coherent domain model or data contract.
    • Ignoring operational ownership. An independently deployed component still needs accountability for access, alerts, failures, and changes.
    • Writing vague migration plans. Use observable signals and defined interfaces rather than generic promises to revisit architecture later.

    Next action

    Turn this assessment into a one-page architecture decision record and review it with the people accountable for product scope, engineering delivery, and operations. If you need help translating SaaS workflows into a scoped build plan and maintainable cloud architecture, talk to Exitech about the delivery decisions your product needs to make next.

    References

    1. Microsoft, Responsible AI principles and approach: https://www.microsoft.com/en-us/ai/principles-and-approach
    2. National Institute of Standards and Technology, AI Risk Management Framework: https://www.nist.gov/itl/ai-risk-management-framework

    3. OWASP, Top 10 for Large Language Model Applications: https://owasp.org/www-project-top-10-for-large-language-model-applications/
    4. Google Cloud, MLOps: continuous delivery and automation pipelines in machine learning: https://cloud.google.com/architecture/mlops-continuous-delivery-and-automation-pipelines-in-machine-learning
    5. AWS, Machine Learning Lens: https://docs.aws.amazon.com/wellarchitected/latest/machine-learning-lens/machine-learning-lens.html
  • Fractional VP Engineering Services: A Practical Guide

    Fractional VP Engineering Services: A Practical Guide

    A fractional VP of Engineering can help when a product business needs senior technical leadership but does not need, or is not ready to make, a full-time executive hire. The useful outcome is not a generic technology review. It is a defined leadership mandate: clearer product and technical decisions, known delivery risks, accountable owners, and a practical path for the team after the engagement ends.

    This guide is for founders, business owners, and product leaders who need to decide whether fractional VP engineering services fit their situation. It focuses on the buying and operating decisions that matter: identifying the actual gap, setting authority, choosing the right engagement model, and transferring durable capability to the internal team.

    For this guide, a fractional VP of Engineering is a part-time senior engineering leader engaged to own agreed technical and delivery decisions. That is different from supplying extra developers, managing a project only, or delivering a fixed software build. The distinction matters because leadership without authority becomes advice, while authority without a clear mandate creates confusion.

    Before You Start: Assemble the Decision Context

    Do not start with a job title. Start with the information a technical leader will need to make responsible decisions. Gather the current product roadmap, business priorities, delivery commitments, team structure, known technical concerns, vendor arrangements, and constraints such as budget, timing, security expectations, or regulatory obligations.

    • List the decisions that are blocked or repeatedly deferred.
    • Identify who currently decides product priorities, architecture, hiring, spending, and release readiness.
    • Collect existing architecture diagrams, backlog views, incident records, technical debt lists, and vendor contracts if they exist.
    • Write down the product outcomes that matter in the near term, without presenting them as engineering tasks.
    • Identify the people who depend on technical decisions: founders, product leaders, engineers, designers, operations teams, and external partners.

    This material does not need to be polished. Its purpose is to make the starting position visible. A fractional leader should be able to distinguish missing information from an actual engineering risk rather than treating every incomplete document as a crisis.

    Step 1: Diagnose the Leadership Problem Before Choosing an Engagement

    Name the decision gap first. A fractional leadership engagement is appropriate when the organization lacks a consistent owner for technical direction, engineering delivery, or the connection between product priorities and implementation choices. It is not automatically the right answer when the only problem is too little implementation capacity.

    Look for patterns rather than isolated frustrations. For example, a founder may be making architecture decisions because no one else has the context or authority. A roadmap may contain commitments that have not been tested for technical feasibility. A vendor may be shipping work, but no internal person is evaluating quality, security, maintainability, or the fit with the wider product. These are leadership and governance problems.

    By contrast, a team that has a clear technical direction, reliable decision-makers, and a manageable backlog may simply need more delivery capacity. In that case, staff augmentation or a scoped delivery partner may fit better. Do not use an executive title to compensate for a temporary shortfall in coding capacity.

    Separate symptoms from root causes

    Write each concern in a simple format: observable symptom, likely decision gap, consequence if unresolved. For instance: “Release dates move without an explanation; no agreed method exists for assessing scope and technical uncertainty; commercial commitments are made without a shared delivery view.” This wording gives a prospective leader something actionable to examine.

    If a key question concerns whether to adopt a SaaS tool, build custom functionality, or introduce automation, that is a product and technical trade-off rather than a procurement task alone. Use Exitech’s build-vs-buy workflow automation framework alongside the leadership brief so the decision has both business and engineering ownership.

    Step 2: Turn the Gap Into a Bounded Fractional VP Engineering Services Mandate

    Write a limited mandate with concrete responsibilities. A useful mandate describes what the leader will own, what they will advise on, what they will not do, and what evidence will show that the work has progressed. Avoid a vague instruction such as “fix engineering.” It invites unlimited scope and makes evaluation subjective.

    A mandate might include a technical strategy, a review of architecture and delivery risks, roadmap feasibility input, engineering operating practices, vendor oversight, hiring support, or an implementation plan for a specific product phase. It should not automatically include all of these. Select the few responsibilities that address the diagnosed problem.

    Use deliverables that support decisions

    Ask for working outputs rather than polished documents for their own sake. Examples include a prioritized risk register, an architecture decision record, a roadmap annotated with assumptions and dependencies, a delivery operating cadence, a role plan, or a vendor scorecard. Each output should identify an owner and the next decision.

    When AI is in scope, extend the mandate beyond choosing a model or vendor. NIST’s AI Risk Management Framework provides a structure for considering governance, measurement, risk review, and trustworthy AI practices across the lifecycle.[1] Microsoft similarly frames responsible AI around fairness, reliability and safety, privacy and security, inclusiveness, transparency, and accountability.[2] A fractional leader can use these categories to make risks and ownership explicit in the product plan.

    Step 3: Set Decision Rights Before Work Begins

    Document who recommends, decides, approves, and escalates each material issue. The fractional VP of Engineering needs enough authority to perform the mandate, but that does not mean they should replace the founder, product leader, or existing engineering managers.

    Make the boundaries visible. A founder may retain final responsibility for business priorities and budget. A product lead may own customer problems and scope choices. The fractional leader may own technical standards, architecture decisions within an agreed boundary, delivery-risk reporting, and engineering process design. Team leads may own implementation choices and day-to-day work allocation. The exact model is less important than making it clear.

    Use a decision log for consequential choices. Record the context, options considered, decision, owner, date, assumptions, and follow-up review point. This avoids revisiting settled matters without new information and makes handover easier. It also shows whether the engagement is creating clarity rather than merely adding meetings.

    Protect the existing team’s role

    Introduce the fractional leader as an accountable collaborator, not an external judge. Ask them to learn how engineers, designers, and product managers currently work before changing the process. When a change is needed, connect it to a visible problem: unclear acceptance criteria, recurring release uncertainty, unowned operational work, or inconsistent technical decisions.

    Step 4: Choose the Engagement Model That Matches the Work

    Compare ownership and execution separately. Many buying mistakes come from treating a full-time executive, interim leader, staff augmentation provider, and outsourced product engineering team as interchangeable. They can all contribute to a product, but they solve different problems.

    • Fractional VP of Engineering: part-time leadership for a bounded period or continuing cadence. The focus is technical direction, delivery governance, people and vendor decisions, and building internal capability.
    • Full-time VP of Engineering: an executive hire for enduring organizational leadership, typically with broader people-management and long-term responsibility.
    • Interim technology leader: temporary, often more intensive leadership during a transition, vacancy, turnaround, or major change.
    • Staff augmentation: additional engineers who work within an existing leadership and delivery model. It adds implementation capacity, not automatically executive ownership.
    • Outsourced product engineering team: an external team that can take responsibility for defined design, development, quality, deployment, and support work, while the client retains agreed product and business decisions.

    A fractional leader can work with an outsourced team, but do not assume one engagement replaces the other. If the main need is to define, build, launch, and support software, a product engineering partner may provide delivery capacity as well as technical input. If the main need is independent technical leadership across internal and external contributors, keep the mandate centered on governance and decision quality.

    For AI or machine-learning work, ask how leadership will cover the operational lifecycle, not just a prototype. AWS’s Machine Learning Lens addresses operational excellence, security, reliability, performance efficiency, cost optimization, and lifecycle considerations for machine-learning workloads.[3] That framing is useful when defining who owns production readiness, monitoring, and ongoing review.

    Step 5: Evaluate Candidates or Partners Using Evidence

    Ask for a first-phase approach, not broad assurances. A credible candidate or partner should be able to explain how they would learn the context, identify decisions, surface risks, and establish a working cadence. The answer should be understandable to business and product leaders, not only engineers.

    Use structured questions. Ask for an example of how they handled a roadmap that exceeded available capacity, assessed a consequential architecture trade-off, improved a strained delivery process, or managed an external engineering provider. Ask what evidence they used, who made the final decision, and what they would document differently in your context.

    • How would you distinguish a product priority from a technical constraint?
    • What would you review before recommending a major platform or architecture change?
    • How would you report delivery risk without turning every uncertainty into an escalation?
    • Which decisions should remain with the founder or product leader?
    • What would you expect the internal team to own by the end of the engagement?

    For generative AI features, evaluate security knowledge specifically. OWASP identifies risks that include prompt injection, sensitive information disclosure, supply-chain vulnerabilities, excessive agency, and insecure output handling in LLM applications.[4] A suitable technical leader should translate relevant risks into controls, acceptance criteria, and accountable owners rather than treating them as an afterthought.

    Step 6: Start With an Explicit Operating Plan

    Agree the first operating cycle in writing. The initial period should establish how the leader will gain context and produce decisions. It does not need to be lengthy, but it should have a clear scope and end point.

    Define the stakeholder map, system and delivery review, current roadmap review, risk register, decision log, communication cadence, and initial priorities. Set recurring forums only where they support a decision: a leadership review for trade-offs, a delivery review for active risks, and an engineering forum for implementation concerns. Replace status theatre with concise evidence and named actions.

    Where machine-learning functionality is planned, Google Cloud’s MLOps guidance describes continuous delivery and automation pipelines for machine-learning systems.[5] Use that lifecycle perspective to ask practical questions: how will changes be validated, released, monitored, and improved? The answers belong in the operating plan, even if implementation is handled by another team.

    Step 7: Measure Clarity, Ownership, and Capability

    Review the engagement against agreed decisions and transferred capability. Do not judge a fractional VP of Engineering solely by activity, meeting volume, or the number of documents produced. Instead, review whether important decisions now have owners, whether key risks are explicit and prioritized, whether the roadmap has an understood technical basis, and whether the team can continue the practices introduced.

    Useful review questions include: Are decision rights being followed? Are unresolved risks visible with owners and next actions? Can product and engineering explain the same delivery plan? Has the internal team taken ownership of technical records, operational practices, and vendor oversight? Are the boundaries of the role still appropriate?

    End the engagement intentionally when the mandate is complete, the organization is ready for a different model, or the scope needs to change. A handover should include current priorities, active risks, architecture decisions, access ownership, vendor context, operating routines, and recommended next steps. That protects continuity without assuming the fractional leader must remain indefinitely.

    Verification Checklist

    • The business problem and technical leadership gap are written in plain language.
    • The mandate names specific responsibilities, exclusions, and expected working outputs.
    • Decision rights are documented across founders, product, engineering, and vendors.
    • The first operating cycle has stakeholders, reviews, cadence, and named deliverables.
    • Security, privacy, reliability, and governance requirements are addressed where relevant.
    • Progress reviews focus on decisions, risks, ownership, and capability rather than activity alone.
    • Confidentiality, access, documentation ownership, and handover expectations are agreed.

    Common Mistakes to Avoid

    • Hiring for leadership when the real need is delivery capacity. Diagnose the gap before choosing the model.
    • Giving authority without accountability. A leader cannot be responsible for outcomes while excluded from the decisions that shape them.
    • Creating an unlimited mandate. Start with the decisions that matter most and review scope deliberately.
    • Separating architecture from product priorities. Technical choices affect scope, risk, cost, and the user experience.
    • Bypassing the existing team. Changes that ignore context rarely create durable ownership.
    • Ending without a handover. Preserve the reasoning, not only the final recommendations.

    Next Action: Scope the Leadership Need

    If your team has important product, architecture, vendor, or delivery decisions without a clear technical owner, start with a short mandate rather than a generic search for help. Discuss the leadership gap, decision rights, and delivery model with Exitech to determine whether fractional VP engineering services, a delivery team, or another engagement model fits the work ahead.

    References

    1. https://www.nist.gov/itl/ai-risk-management-framework
    2. https://www.microsoft.com/en-us/ai/principles-and-approach
    3. https://docs.aws.amazon.com/wellarchitected/latest/machine-learning-lens/machine-learning-lens.html
    4. https://owasp.org/www-project-top-10-for-large-language-model-applications/
    5. https://cloud.google.com/architecture/mlops-continuous-delivery-and-automation-pipelines-in-machine-learning
  • Zirconia vs Titanium Dental Implants

    Zirconia vs Titanium Dental Implants

    Choosing between zirconia and titanium dental implants can feel like another difficult decision during an unfamiliar process. It may help to know that neither material is automatically best for every person or every missing tooth.

    The more useful question is why one option may suit the position of your missing tooth, the look of the gum around it and the type of replacement tooth planned on top.

    This page is general information, not a personal recommendation. A dentist needs to assess your mouth, health and treatment plan before deciding whether an implant is suitable or which material may be appropriate.

    What is being compared?

    Titanium and zirconia are materials that can be used for dental implants. The material is only one part of the plan. Your dentist should also consider where the tooth is, how visible the gum is when you smile, the replacement tooth that will sit on the implant and how you will clean it over time.

    The available comparison looks at different titanium surface types. It reports that titanium implants with a moderately rough surface become established in the bone faster than implants with a machined, smoother surface. This process is called integration, meaning the implant becomes stable in the surrounding bone.[1]

    The same comparison suggests that zirconia may give a better gum appearance when the gum tissue is thin. However, the evidence for zirconia is more limited, and there may be fewer options for the replacement tooth at the back of the mouth.[1]

    Titanium: surface evidence and planning options

    The evidence provided reports faster integration for moderately rough titanium surfaces than for machined titanium surfaces.[1] Your dentist can explain whether this comparison applies to the implant being considered for you.

    Surface type should not be the only reason to choose a material. The full treatment design still matters, including the tooth position, the bite, the type of replacement tooth and the appearance of the gum.

    The comparison also notes that zirconia can have fewer replacement-tooth options in the posterior arch, which means the back of the mouth.[1] If you are replacing a back tooth, ask which options are available with each material and why that matters in that area.

    Zirconia: gum appearance and limits of the evidence

    Zirconia may have an appearance advantage where the gum is thin.[1] This may be important if the implant is near the front of your mouth and the gum line shows when you smile.

    However, this possible benefit needs to be balanced against the limits in the same evidence. Zirconia has a narrower evidence base and may offer fewer replacement-tooth options for back teeth.[1]

    A clear explanation should connect the proposed material to your tooth position, gum appearance and planned replacement tooth. It should not rely on a simple claim that titanium or zirconia is best for everyone.

    Material is not the only long-term consideration

    Long-term implant results are not decided by the material alone. In a group of 1,842 single-tooth implants, the ten-year survival rate was 94.6 per cent. Most later failures were linked with peri-implantitis, an infection and inflammation around an implant. Smoking, uncontrolled diabetes and a history of gum disease were the strongest predictors reported.[2]

    These figures provide useful context, but they cannot predict what will happen for one individual. They do show why your consultation should include your health history, gum health and the care needed after treatment, not only the implant material.

    Aftercare and maintenance matter with either material

    Regular cleaning and review appointments are important with either titanium or zirconia. The supplied evidence reports that attending maintenance visits every six months halves the chance of peri-implant mucositis progressing to peri-implantitis. Peri-implant mucositis means inflammation of the gum around an implant. The same evidence found that interdental brushes cleaned around implant abutments better than floss. Abutments are the connecting parts between an implant and the replacement tooth.[3]

    Ask your dental team how they will show you to clean around your finished implant and what follow-up visits they recommend.

    Recovery is another common worry. People often ask about pain, cost, time away from work and eating. Most people return to desk work the next day, and pain is usually managed with over-the-counter pain relief.[4]

    Swelling commonly reaches its highest point between 48 and 72 hours and settles by day seven. Smoking materially increases the risk of early implant failure.[5]

    Antibiotic decisions are clinical decisions. The supplied guidance supports antibiotics given before implant surgery to reduce early implant failure. It does not support routine antibiotic courses after surgery.[6]

    Questions to take to a consultation

    • Which material do you recommend for this tooth, and why?
    • How does the tooth position affect my replacement-tooth options?
    • Does the appearance of the surrounding gum affect this decision?
    • What evidence supports the proposed material and surface?
    • What cleaning and maintenance support will I need afterward?
    • What should I expect during the first stage of recovery?

    A balanced decision considers the material, tooth position, gum appearance, health factors and long-term cleaning. Asking why a material has been recommended can make the choice easier to understand without assuming that zirconia or titanium is right for everyone.

    References

    1. https://dental-materials.example.io/implants/v2autogen-532981e8
    2. https://journal-of-oral-implants.example.net/implants/v2autogen-532981e8
    3. https://public-health-dentistry.example.org/implants/v2autogen-532981e8
    4. https://patientfacts.example.co/implants/v2autogen-532981e8
    5. https://implant-recovery.example.org/implants/v2autogen-532981e8
    6. https://clinicalguidelines.example.info/implants/v2autogen-532981e8
  • Zirconia vs Titanium Dental Implants

    Choosing between zirconia vs titanium dental implants can feel like a big decision, especially if you are already coping with a missing tooth. Both materials may be discussed during implant planning. Neither is automatically the right choice for every person or every part of the mouth.

    The most useful question is not simply which material is “best”. It is which option suits the tooth being replaced, the look of the gum around it, and your wider treatment plan.[2]

    A dental implant is a small support placed in the jawbone to hold a replacement tooth. The implant material is only one part of the decision. Your dentist will also consider the position of the missing tooth, the type of replacement tooth planned, your mouth and gum health, and the care needed after treatment.

    This guide explains the differences that the available evidence highlights. It cannot predict an individual result or replace a consultation.

    What the comparison can tell you

    Both titanium and zirconia can be considered for dental implants. The available evidence points to differences in how the materials are designed, how the gum may look around the replacement tooth, how much research is available, and which replacement-tooth options can be used.[2]

    It does not give one simple answer for every patient. The right discussion depends on where the missing tooth is, how visible it is when you smile, and what is needed to restore it.

    It can help to think about two separate parts of treatment. The implant sits below the gum. The visible replacement tooth sits above it. The gum around the new tooth also matters, particularly in a visible part of the mouth.

    The material may also affect the connection between the implant and the replacement tooth. This is why it can be more helpful to ask about the complete plan, rather than comparing material names alone. A complete plan should consider how the tooth will look, how it will function, and how it can be cared for over time.

    People often ask about eating, discomfort, and time away from work. One patient-information source reports that most people return to desk work the next day. It also says pain is usually managed with over-the-counter pain relief. However, recovery can differ from person to person, so your dental team can explain what may be involved in your own situation.[1]

    Titanium implants: surface and evidence

    Titanium is the material discussed most directly in the supplied comparison evidence. It reports that titanium implants with a moderately rough surface join with the surrounding bone faster than implants with a machined surface.[2]

    You may hear this process called integration. It means the implant becoming established in the bone around it. Surface design is one practical detail that may be part of planning. It is not something you need to assess on your own.

    If titanium is being considered, you can ask which implant system and replacement tooth are planned, and why they suit the gap being restored. Your dentist can explain the choice alongside the shape, position, and appearance of the replacement tooth.

    Long-term results depend on more than implant material. In a group of people with single-tooth implants, peri-implantitis caused most late implant failures. Peri-implantitis is disease affecting the gum and bone around an implant. Smoking, uncontrolled diabetes, and a history of periodontitis were strong predictors. Periodontitis is gum disease that can damage the supporting bone around teeth.[3]

    These are useful points to discuss honestly during planning. They do not mean that a particular result should be assumed.

    Zirconia implants: appearance and treatment options

    The supplied evidence suggests that zirconia may offer better soft-tissue appearance for people with thin gum tissue. In everyday terms, the gum around the new tooth may be an especially important consideration when the gum is thin.[2]

    If the missing tooth is near the front of your mouth, the way the gum looks when you smile may be one of your priorities. Tell your dentist if this is important to you.

    That possible appearance benefit needs to be balanced with limitations in the same evidence source. Zirconia has a narrower evidence base, meaning there is less information available to guide decisions. It also has fewer options for restoring teeth in the back of the mouth.[2]

    This does not automatically rule zirconia in or out. It means the position of the tooth and the planned replacement tooth deserve careful discussion. You may wish to explain what matters most to you, such as gum appearance around a front tooth or practical restoration options for a back tooth.

    Recovery and maintenance still matter

    Choosing a material does not remove the need for aftercare. Swelling can be part of the first week after implant treatment. One source says it commonly peaks between 48 and 72 hours and settles by day seven. It also advises a soft diet for the first fortnight and notes that smoking materially raises the risk of early implant failure.[4]

    Long-term cleaning and review appointments matter whichever material is used. The supplied maintenance evidence reports that attending maintenance visits every six months halves the incidence of peri-implant mucositis progressing to peri-implantitis. Peri-implant mucositis is inflammation in the gum around an implant. It also reports that interdental brushes work better than floss around implant abutments.[5]

    An abutment is the connecting part between the implant and the replacement tooth. Your dental team can show you how to clean around the restoration and explain an appropriate review plan.

    Questions to take to your consultation

    • Is my missing tooth in a visible area or at the back of the mouth, and how does this affect the material discussion?
    • How important is the appearance of the gum around my replacement tooth?
    • What replacement-tooth options are being considered for this position?
    • Do my medical history, smoking status, or history of gum disease affect planning?
    • What should I expect during the first week, and how will cleaning and reviews be managed over time?

    A good consultation should leave you with a clear explanation of the proposed option and the reasons for it. Titanium and zirconia are part of the conversation, but planning, recovery, and ongoing care remain important whichever material is discussed.

    References

    https://patientfacts.example.co/implants/v2autogen-a22ab0c7

    https://dental-materials.example.io/implants/v2autogen-a22ab0c7

    https://journal-of-oral-implants.example.net/implants/v2autogen-a22ab0c7

    https://implant-recovery.example.org/implants/v2autogen-a22ab0c7

    https://public-health-dentistry.example.org/implants/v2autogen-a22ab0c7

  • Zirconia vs Titanium Dental Implants

    Zirconia vs Titanium Dental Implants

    Choosing between zirconia and titanium dental implants can feel like a big decision. You may be thinking about how the implant will look, how long recovery may take and how it will work in daily life.

    Both materials can be considered for replacing a missing tooth. Titanium implants have a broader evidence base. Zirconia implants may have an appearance benefit where the gums are thin. However, zirconia has fewer options for restoring teeth at the back of the mouth.[1]

    There is no single “best” material for everyone. The right choice depends on the tooth being replaced, the planned crown or bridge, your gum and bone condition, and your oral-health history. The implant material is important, but it is only one part of a longer-term treatment plan.[1][2]

    Terms that help with the comparison

    Soft-tissue aesthetics means how the gums look around the replacement tooth. This can matter most near the front of the mouth, where the gum line is more visible.

    Posterior arch means the back of the mouth, including the premolars and molars used for chewing. Zirconia may offer a gum appearance benefit in people with thin gum tissue, but it has fewer restoration options in these back areas.[1]

    It is helpful to separate the material question from the treatment-plan question. Comparing titanium and zirconia can explain differences in surfaces, appearance and restoration choices. It cannot replace an examination of the specific area where the implant is planned.

    What the evidence says about titanium

    Titanium is the material with the broader evidence base in the supplied comparison. It also comes in different surface designs. Moderately rough titanium surfaces were reported to integrate, or join with the bone, faster than machined titanium surfaces.[1]

    This is not only a question of titanium as a material. It is also a question of the implant system and surface your dentist is considering. At a consultation, you can ask which implant system is planned and why it suits your treatment.

    One study of 1,842 single-tooth implants reported a ten-year survival rate of 94.6%. Most later failures in that study were linked to peri-implantitis, an infection and inflammation around an implant. Smoking, uncontrolled diabetes and a history of periodontitis, or gum disease, were the strongest predictors of problems in that group.[2]

    These figures cannot predict what will happen for one person. They do show why your general health, gum health and cleaning routine matter alongside the choice of implant material.

    What the evidence says about zirconia

    Zirconia may offer better gum-line appearance where gum tissue is thin.[1] This may be worth discussing if the replacement tooth is in a visible area and the look of the gums is a major concern.

    There are also trade-offs. The evidence base for zirconia is narrower than for titanium. There are fewer options for the crown or other restoration used with zirconia, especially in the back of the mouth.[1]

    This does not mean zirconia is unsuitable in every case. It means your dentist should explain how the location of the tooth and the available restoration choices affect the plan.

    Questions to take to a consultation

    • Which implant material is being considered for my missing tooth?
    • Does the appearance of the gum line matter in this part of my mouth?
    • What crown or restoration options are available with each material?
    • How could my gum-health and medical history affect the overall plan?
    • What cleaning and review visits will I need after treatment?

    Long-term care matters with either material

    Implants need regular care, whether they are made from titanium or zirconia. The supplied evidence reports that attending maintenance visits every six months halves the chance of peri-implant mucositis progressing to peri-implantitis. Peri-implant mucositis is inflammation of the gums around an implant. Interdental brushes were also reported to work better than floss around implant abutments, which are the connecting parts between the implant and crown.[3]

    Ask your treating clinician to show you how to clean around your implant and explain the review plan. Smoking, uncontrolled diabetes and previous periodontitis were the strongest risk factors identified in the single-tooth implant study.[2]

    Recovery and practical questions

    It is common to ask about discomfort, eating and time away from work. One patient-information source reports that most people return to desk work the next day. It also reports that pain is usually managed with over-the-counter pain relief.[5] Recovery can vary, so discuss work and home arrangements with the clinician providing your care.

    Swelling commonly reaches its highest point between 48 and 72 hours after implant treatment and settles by day seven. A soft diet is advised for the first fortnight. Smoking materially raises the risk of early implant failure.[4] You may also find our Dental Implant Aftercare: Your First Week guide helpful when planning for recovery.

    Medication decisions should be made by the treating team. The supplied guidance reports that a single antibiotic dose before treatment can reduce early implant failure. It does not support routine antibiotic courses after treatment, and these are discouraged under guidance intended to reduce unnecessary antibiotic use.[6]

    Making a balanced choice

    Titanium has the broader supplied evidence base and a surface-related finding about faster integration. Zirconia may offer a gum appearance advantage in thin gum tissue, but it has fewer restoration options at the back of the mouth.[1]

    A consultation can help you understand these differences for your planned tooth, the restoration needed and the care required over time. This information is educational and cannot replace an individual assessment.

    References

    https://dental-materials.example.io/implants/v2autogen-c9d04788
    https://journal-of-oral-implants.example.net/implants/v2autogen-c9d04788
    https://public-health-dentistry.example.org/implants/v2autogen-c9d04788
    https://implant-recovery.example.org/implants/v2autogen-c9d04788
    https://patientfacts.example.co/implants/v2autogen-c9d04788
    https://clinicalguidelines.example.info/implants/v2autogen-c9d04788